Remember our Rhyming Eggs guest post? We saved the eggshells to make some art with, and we finally got it done! I had the girls peel all the eggs (after we dyed them; I did not hold onto eggs for two week...ick).
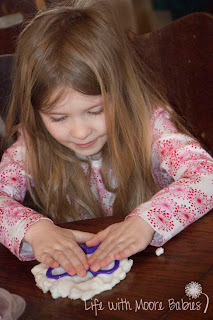
Then I made some air dry clay to play with with our eggshells. To make the clay I combined 1 C of cornstarch, 2 C of baking soda, and 1 1/2 C water in a pot and cooked over medium, stirring constantly. Once the mixture gets to boiling it takes no time at all to combine into a lump of clay! Seriously start to finish it took maybe 10 minutes!(For more complete instructions and pictures visit Growing a Jeweled Rose.) You will want to let the clay cool in a bowl covered with a damp cloth (so it doesn't dry out). The girls picked out an assortment of cookie cutters, a rolling pin and a meat tenderizer (to crush the egg shells better). Then they went to work.
Eli was most excited about the "fffssshh" (fish for those who don't speak Eli) cookie cutter. He played until he decided the clay was for throwing. The girls rolled and cut and decorated over and over. They finally decided on a few things to make and got to work on them. They kept telling me the eggs shells were "sparkles."
Once they were done we just left their creations on a waxed paper lined cookie sheet to dry. It took a couple days before they were done. NOTE: If you want the shells to stay on they have to actually be pressed into the clay; it took a couple reminders to get the girls to do this!
I made this bowl by actually mixing the eggshells in the clay. The girls had tried it and thought it was too pokey. It isn't really pokey as long as the shells are fine; big pieces do hurt a little.
I am sure if we want the shells to stay on long term we will have to put some sort of clear coat on the top, but we haven't tried that (at least not yet)! The girls certainly enjoyed adding "sparkles" to their clay creations, so don't throw out those eggshells! Use them for art!


