Showing posts with label Craft. Show all posts

Sunday, November 10, 2013

Egg Carton Owls


These cute little owls are based on the ones made by Art and Soul Preschool. The girls auntie came across them, and (not so subtly) requested some of her own.  Even Eli was happy to make some because it meant he got to paint!

To start with you need an egg carton. Cut the top off the bottom. Then cut the top in two pieces and the bottom into sections of two to make eyes. When Cutting the eyes be sure to include the pointy section between the egg spaces to make the beak!  You can also vary the angle of your scissors to give them slightly different look. We made 4 owls, so we used two egg cartons.


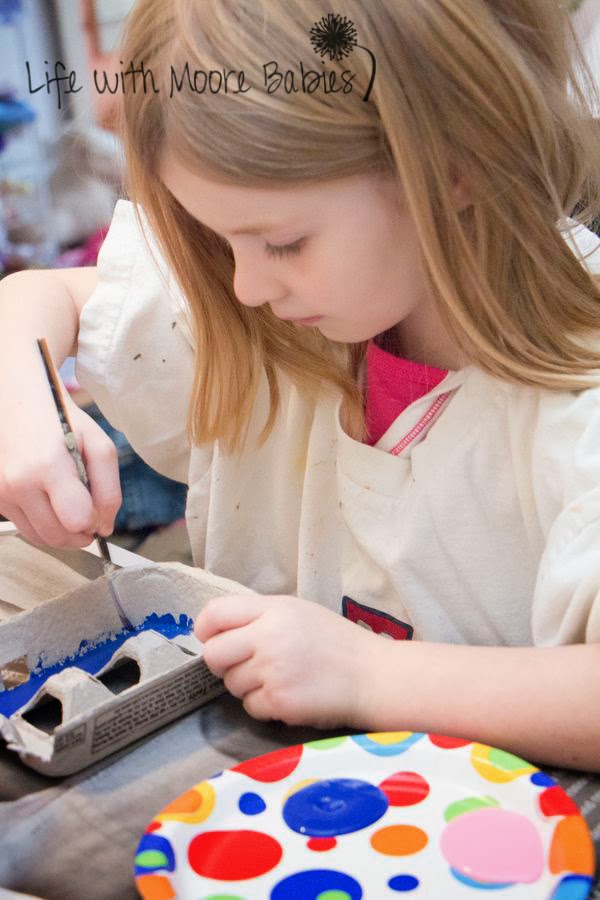
Next you need to paint your egg cartons. We chose to go with whatever colors the kids wanted rather then sticking to fall colors. Eli enjoyed painting on the table too. 


Once they are dry you can glue on some feathers and glue your eye sockets on. Then add some eyes. We went with large googly eyes because they were most owl like. And here are our finished owls (I made one too just because we had the supplies). We delivered them that night, and I think their auntie was quite pleased!


Thursday, November 7, 2013

Season Tree Sun Catchers


We made these cute hand print sun catchers using oil pastels and a laminator! Head over to Enchanted Homeschooling Mom to read how you can make some too!

Wednesday, October 30, 2013

Hedge Apple Flowers


As part of a nature exchange this fall we collected some hedge apples.  For those of you who don't know, those big green, wrinkly looking balls in the picture below are hedge apples. They come from the Osage Orange Tree and are also called Osage Oranges or "green brains" according to Bria.


I have been told they are good for repelling bugs, and even though I don't know how true it is, they are kind of pretty, so we kept some around. A co-worker (thanks Cathy) of mine mentioned that her grandma used to slice them and bake them to make flowers for all the grand kids. She couldn't remember anything exact about them though.....challenge accepted! 

You need a sharp knife to get through these suckers, and I would recommend wearing gloves because the thick fluid that comes out of them takes some hard scrubbing to get off! Slice as thin as you can. It isn't easy to get them very thin, but they cook better if you can get them thin without breaking them.


If you want to add stems after they are baked I would make your holes before baking because they become hard after they are cooked! Lay them on a foil lined baking sheet (the foil is just to keep the sticky stuff on your pan) and put them in your oven at the lowest possible temperature for several hours (It took ours about 4 hours to dry, but this varies with thickness). You will notice they curve up a bit once they are baked.


Allow to cool and then add whatever color pipe cleaner you like for a stem! We went with sparkly! 


Here are the completed flowers with a couple whole hedge apples. Quite festive on our piano, don't you think!


Sunday, October 20, 2013

Egg Carton Dragon Puppet


Remember the royal toilet paper roll puppets I shared over at Enchanted Homeschooling Mom.


To go with them, I put together this egg carton dragon puppet! You start with 2 egg cartons.


Paint the bumpy part white. Then I painted the area between what would become the teeth red for gums,  but you could easily leave it white too.


If your egg carton has holes in the top you can just hot glue a piece of cardboard over them and then paint the rest green.


Cut off the last two bumps on both egg cartons. This makes a spot for you to put in your hand (fingers on tops and thumb on the bottom), so your dragon can open his mouth to eat the villagers talk. If I had been thinking I would have cut off the back of the egg carton before painting it.


One of the sections you cut off becomes the dragons eyes with a little black paint and hot glue.


Then you should have something that looks a bit like this. I made hits be a dragon, but he could easily be a dinosaur or an alligator too.


The next step is to make a neck to hide your arm.  If you are lucky you have an old long sleeved shirt that matches lying around, so you can just cut off the sleeve and use it. (I happened to have an old green sweater that worked well!  If not you have to sew a sleeve. Then you hot glue it around the entire back of your dragon (including his teeth; it helps keep him together).


All you have to do now is insert your hand and put on a show (or eat the other puppets)!


The girls really enjoy their dragon, but he is a bit big for their little hands. This puppet is best operated by an older child or an adult. In our case Daddy makes the best dragon. Eli really enjoyed him and kept coming up to the puppet, yelling "BITE," and giggling as he ran away!

Thursday, October 17, 2013

Pour Paint Pumpkins


We haven't made our annual trip to a pumpkin patch yet, but when we can across some little pumpkins in the  store, the girls begged for some.  Lucky for them I already had a plan for them! So we picked up a few as well as some acrylic paint.

Once we were home we headed out with our pumpkins, paints, and some disposable cups (I think bottles would have worked well, but I don't know how well they would have stayed up with little people.) We placed the pumpkins upside down on the cups and then squeezed the paint on layer after layer.


The girls got a bit over enthusiastic with theirs, completely covering some of their first colors completely. 


After we finished the pumpkins, I set them aside and the girls made prints of the swirly paint left behind on the sidewalk. They even went ahead to add more paint to the swirls just to make more pictures!


And they did make some pretty pictures!


Due to the thickness of paint the girls put on their pumpkins, I let them to dry for at least 24 hours. Then I removed them from the cups, and this is what they looked like!


The more round pumpkins worked better then the flatter ones because the paint could curve around then better. I think using a bottle instead of a cup would help too, but I am pleased with how they turned out! All the kids were pretty excited about them too! Hooray for colorful pumpkins!


Tuesday, October 8, 2013

Fall Craft Extravaganza from Mom's Library


Welcome to Mom's Library!


Filled with parenting tips, activities for young children, devotionals, crafts, recipes, and more!
Check back again and again to see the new posts!

(We have a great Giveaway too!)

 If you enjoy the link party, please follow Life with Moore Babies by email or RSS feed.

You can also follow us on FacebookGoogle +Twitter, or Pinterest!


Features in the Fall Craft Extravaganza this Week! 


Crafty Mom's Share added some color to plain old acorns!


Two-da-loo captured fall in these beautiful sun catchers!


The Taylor House come up with some simple, seasonal luminaries!


Creating Joyfully created colorful, sparkling pumpkins!


Sow Sprout Play turned their pumpkins into scratch art!


Mom Projects painted some adorable pumpkins!


How Wee Learn decorated pumpkins with colorful lite brite pegs!


Preschool Powol Packets painted with pumpkins!


Teaching Mama used orange shaving cream paint to come up with these little pumpkins!


Two-da-loo used paper scraps to make some cute jack o'lanterns!


Crafty Journal made a darling little scaredy cat! 


The (mis)Adventures of a Born Again Farm Girl came up with some super cute owls using cupcake papers!


Happy Hooligans made some adorable owls with toilet paper rolls and buttons for eyes!


If I have featured you please feel free to grab my featured button!

For more great features visit my fellow Librarians (Please follow them too!):


Want to see all the great posts added last week? Click HERE to see the whole collection!

Want to see even more featured posts? Follow the Mom's Library Pinterest Board!


To spice up your life (bad pun intended) we have a McCormick Gift Set to give away!! To read more about this awesome set visit True Aim!


Would you like to Participate?


If you are new and would like to link up please checkout the Mom's Library Page.Support your fellow bloggers and comment on at least 2 other links.

Thank you for participating; we love to see your ideas! Please grab the button and share!


parents as teachers

*By linking up, you are granting me permission to use and/or re-post photographs from your blog or website.