Showing posts with label Pumpkin. Show all posts

Thursday, October 17, 2013

Pour Paint Pumpkins


We haven't made our annual trip to a pumpkin patch yet, but when we can across some little pumpkins in the  store, the girls begged for some.  Lucky for them I already had a plan for them! So we picked up a few as well as some acrylic paint.

Once we were home we headed out with our pumpkins, paints, and some disposable cups (I think bottles would have worked well, but I don't know how well they would have stayed up with little people.) We placed the pumpkins upside down on the cups and then squeezed the paint on layer after layer.


The girls got a bit over enthusiastic with theirs, completely covering some of their first colors completely. 


After we finished the pumpkins, I set them aside and the girls made prints of the swirly paint left behind on the sidewalk. They even went ahead to add more paint to the swirls just to make more pictures!


And they did make some pretty pictures!


Due to the thickness of paint the girls put on their pumpkins, I let them to dry for at least 24 hours. Then I removed them from the cups, and this is what they looked like!


The more round pumpkins worked better then the flatter ones because the paint could curve around then better. I think using a bottle instead of a cup would help too, but I am pleased with how they turned out! All the kids were pretty excited about them too! Hooray for colorful pumpkins!


Thursday, October 3, 2013

Yarn Pumpkins


Look at the cute yarn pumpkins we made to decorate our table! Head over to Enchanted Homeschooling Mom to find out how we made them!

Monday, April 22, 2013

Growing Pumpkins in Pumpkins


Growing a Pumpkin in a Pumpkin; fun idea right? This is another one of those projects I found on Pinterest that had nothing but a picture. *sigh* I wasn't sure it would work, or if there would be some sort of secret I needed to know.  And I really wanted to try it with big pumpkins, but mine rotted before we could. Besides I have no idea what we would have done with them through the winter!  

Luckily we still had some little pumpkins that hadn't rotted! 


Start by cutting the top off. I am terrible at this apparently, so it is a really good thing the top didn't have to go back on!  The girls were amazed by the seeds, and I was happy it wasn't too gooey after sitting so long.


I had each girl put some dirt in a pumpkin. I used a seed starter to be on the safe side, but pumpkins are supposed to be super easy to grow, so maybe it doesn't matter.


Of course we watered the pumpkins then and waited.


About a week later something is starting to show!


Within 3 days one of the pumpkins is exploding with sprouts! The other was just a little behind with two up and more pushing.


We decided we better plant them! You could see on the bottom all the roots coming through the pumpkin. This little pumpkin even had a shoot trying to come out the side!


The whole pumpkin gets planted and the girls water them (more then) thoroughly.


Now we hope the weather stays warm enough not to kill our pumpkins! Although if they are really as easy as everyone says they should come up anyhow! 

What I really like about this little experiment is how it demonstrates the circle of life. The new growth comes from the old and is nourished by the old. Really shows how nature works to maintain plants. Even seeds that fly away from their host are nourished by decomposing leaves and such in the soil. This just happens to be in one compact little pumpkin! 


Tuesday, November 13, 2012

Glittered Pumpkins


After choosing pumpkins from the Pumpkin Patch, Bria informed me this year she wanted to put glitter on her pumpkins.  That sounded quite a bit easier then our Melted Crayon Pumpkins from last year, so I was all for it!   All the kids chose some glitter while we were out shopping.  Unfortunately we somehow lost Eli's once we were home, so his pumpkin had to wait a bit. For the girls, I mixed some Elmer's glue and water just like I did for the Frosted Gourds, and turned them loose with paintbrushes and glitter.


Skippyjon Jones was very interested in the whole process and ended up a little glittered himself.


After buying more glitter for Eli's pumpkin (I can't believe we still can't find it), I glittered his.  I would have let him help, but I remember him swimming in it with our Cloud Sensory Bin!


Here they all are!


The glittered ones do look pretty!


Sunday, November 11, 2012

Frosted Gourds


I am not sure why we decided to do this, other then I had seen some people do it to mason jars on Pinterest and thought I would give it a try.  The girls had picked out an over abundance of gourds at the pumpkin patch this year, so I just wondered how they would look frosted.

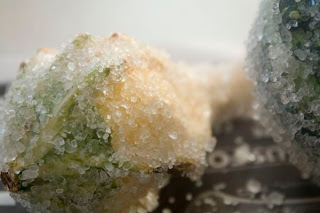
I started with watered down Elmer's glue (1/2 glue, 1/2 water), a paint brush, Epsom salt, and GOURDS!


I painted the glue mixture on the gourds.


Then I rolled it in Epsom salt.


Repeated on the other side and left it to dry.


Well that was easy enough.  After I did a couple the girls decided they wanted to help.  They didn't get the glue quite as even, but that didn't matter.  They still looked frosty.


I really think they turned out pretty as we head toward colder weather.  Frosting your gourds makes them fit the winter scheme more, so you can display them a little longer. Unless you are like me and really don't decorate much by the season in which case you will have frosty gourds until they get mushy in March! Here are my frosted gourds with some unfrosted ones. We did a couple little pumpkins too!