Recently, while wandering past the water beads, I found water cubes! They are bigger then the normal water beads, and they are cubes. Obvious yes, but I thought the different shape was interesting.
With it being winter, the logical thing to me was to freeze some of them into ice cubes (Thanks to Growing a Jeweled Rose). Not to drink though!
So here is what they look like out of the package.
And halfway hydrated.
And fully hydrated.
Then i set a few of them on a waxed paper lined cookie sheet and froze them. My hope was for them no to become a huge glob of ice cubes!
I placed the frozen cubes in one side on my bin and the non-frozen ones on the other side. I went looking for penguins or polar bears to add, but all I came up with was one penguin. Didn't really matter as the girls were more entertained by the difference between the frozen and non-frozen cubes. I kept Eli out of this one because the cubes were a good choking hazard size, and he has been putting everything in his mouth lately!
Bria thought the the non-frozen ones looked like jewels.
They spread the frozen cubes out to make them look like icebergs.
Then we waited and observed them as they thawed too. I guess I didn't really think about what would happen to a frozen water bead. Surprisingly, it turned to mush. I guess freezing disrupts the molecules enough that they no longer hold their shape.
Eventually they thawed completely and were clear again. Somehow my camera missed that! It was pretty interesting to have the mush along with the whole cubes though. So as long as you don't want beads (or cubes) anymore try freezing them for a new sensory experience!
I came across this at the end of last week Squishy Baff H2Goo. I was intrigued by it but did not want to spend the money to order it. I was also unsure about actually letting my kids bathe in it, so I started researching. I discovered it was made from Sodium Polyacrylate which happens to be the same stuff they use to make disposable diapers absorbent. Looking further I found the second ingredient was Sodium Chloride; just plain salt. Well, I have a few disposables around for Grandma and Daddy and any other baby sitter to use, and I certainly have salt, so I wanted to try it. First I just tried it on a very small scale in a Tupperware dish. I cut open the diaper and collected all the crystals I could into the dish then added water. No surprise, I got gel. Then I sprinkled with salt and waited a few minutes. Ah ha! I have water again! It didn't all go back to water, but most of it did. Maybe I didn't use the right amount, or maybe since the crystals had some of the cottony stuff and the salt had iodine it didn't work completely. Oh well, still cool. So I decided to try it on a larger scale with the water table and some water beads. I harvested crystals from 5 diapers and tried to pick out as much cottony stuff as I could. I added it and water beads to the table along with some water. Then we got a call to go to lunch with a friend, so we left our project to return later.
I found cutting into the outside of the diaper was easiest.
The sparkly things are the Sodium polyacrylate crystals
You get some of the cottony stuff too .
Just pull it out and you are left with crystals.
Sprinkle the crystals on water and you get gel.
When we returned the water was pink from some of the water beads bursting because they sucked up so much water out in the heat. The gel was very broken up as well, so I collected what I could and went to harvest more diapers. Once I had my gel, back into the water table it went. Well, first the water table came inside to avoid the 100 degree temperature outside (again)!
Before it went back into the table. You can see the gel surrounding the water beads,
Squishing it.
The girls had fun playing with it for a while, but they really enjoyed it once I gave them shovels and threw in some marbles for them to dig for. The instantly started digging for their treasure!
You can see the gel all around the yellow part where the girls dumped it in the column.
Treasure!
Once Eli got up from his nap he joined in the digging fun. Although he was trying to use the shovel as a spoon instead.
After getting after Eli to stop trying to eat the gel I decided it was time to turn it back into water. I sprinkled the top with water and waited a few minutes.
With salt sprinkled on top.
You could see the water oozing out all around the beads. After stirring it most all the gel was liquid again.
Water again!
Shoveling the water all over the kitchen floor.
There was still some where the salt couldn't reach, so I rinsed it all out and added new water. Now Eli could use his shovel to drink much more safely. Which he immediately tried to do.
The girls did put some in little bags before turning it back to water, so we can still play with it again.
It is definitely cool to watch it turn back into water (see video below), so I am sure we will play with this again. I am thinking the gel they use for flowers may be the same stuff, so I am going to look into that. Diapers were certainly cheaper though!
My lovely sister informed me of a pond nearby with blooming water lilies, so we headed out to take some pictures. Then we took Grandma out to show her the lilies the next day. It was a pretty impromptu trip, but the girls didn't really mind exploring in their dresses. The water lilies are beautiful. We also learned they have very tough stems, and the flowers smell like almond extract. The girls got especially excited anytime they could spot a frog!
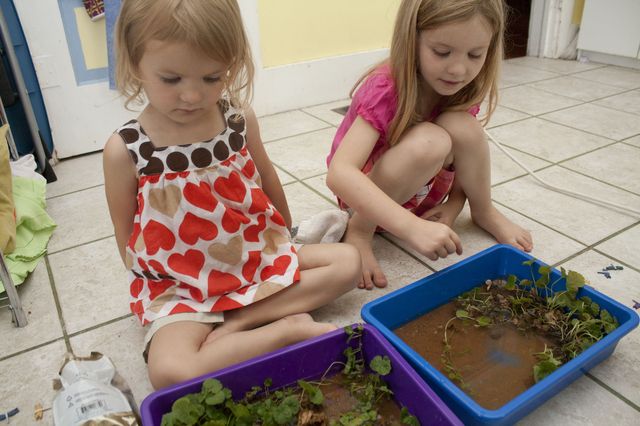
This little trip got me thinking about something I could put together with the girls to learn a little about the pond. What I came up with was a little sensory bin that we could put together out of stuff we had at home (this also made me think we keep some odd things around this house).
We started with a little blue plastic bin. We added some sand to the bottom. I did not add dirt; I did not want that big of a mess! We did have some nice smooth rocks to stick in too. Then we added a little water.
We added some weeds I found in the back yard that resembled water lilies. I suppose I could have found some fake water lilies, but that would have required a trip to the store. Besides with these they could see how the roots would still be under ground. We added a little more water after we got our plants situated.
Then we added our extremely realistic little animals
.
Just for fun we through in some blue water beads for bubbles, frog or fish eggs, or whatever. And our little pond is complete!
We added some ice to ours as well to show the girls how the ice would float, so the fishes could still live in the pond through the winter.
I also found this little worksheet to show the girls the life cycle of a frog, Frog Life Cycle, all they had to do was color it.
The girls always enjoy playing with slippery, little water beads, so when I learned of a way to make them "glow," I started digging out our black light. Yes, you need a black light of some sort, so it isn't truly glowing. It is still really cool though!
To start with you need clear water beads (check the floral department of most any store (our tiny Wal-Mart even had them), highlighters, and a black light. You have to start by taking the highlighters apart to get to the inner marker section.I found squishing the end with pliers and then prying it apart with a butter knife worked well.
Run the marker part under water to get out all the ink. I had my water at a very slow stream and squeezed the ink out to keep it as concentrated as I could.
Place your water beads in a bowl (1 bowl per color) and add your colored water. Wait for them to get all puffy and smooth. I underestimated the number of water beads I had, so I ended up having to dilute my color with more water in order to get them all puffed up. Once they are fully engorged with water they are ready to play with!
Right after placing them in the water.
Found a blue and a pink highlighter to try too.
Ready to go!
This is where you need the black light. Add the beads to whatever dish you want to play with them in and place them in a dark room with very little light other then the black light. We went into the girls closet, but left the door open, so I could take pictures of them.
Our set up with the black light sitting next to the beads.
Eli had to get in the fun literally!
I think they would have played all day! Eli tried to stick them in his mouth a couple times, but quickly learned it was more fun to throw them. He also kept climbing into the container, but that ended with nap time. The girls continued playing a bit longer even with the lights on. The glowing was cool, but really water beads are just a lot of fun!